Login and setup guide
Follow these steps to get started with Truck Box. Replace each placeholder with your real screenshots.
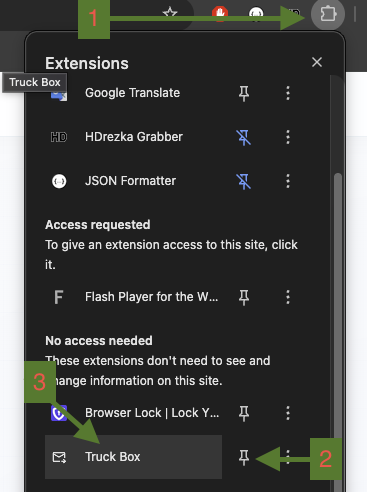
Step 1 — Install extension
Open the Chrome Web Store and install Truck Box. Pin it to your toolbar for quick access.

Step 2 — Open popup
Click the Truck Box extension icon in Chrome to open the login panel.
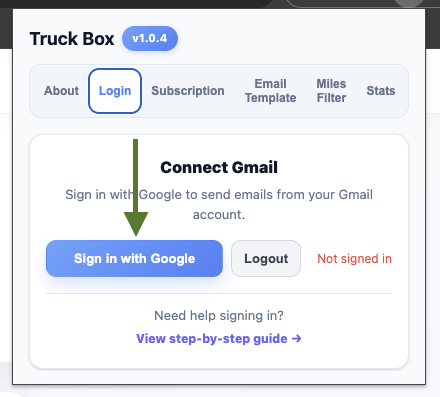
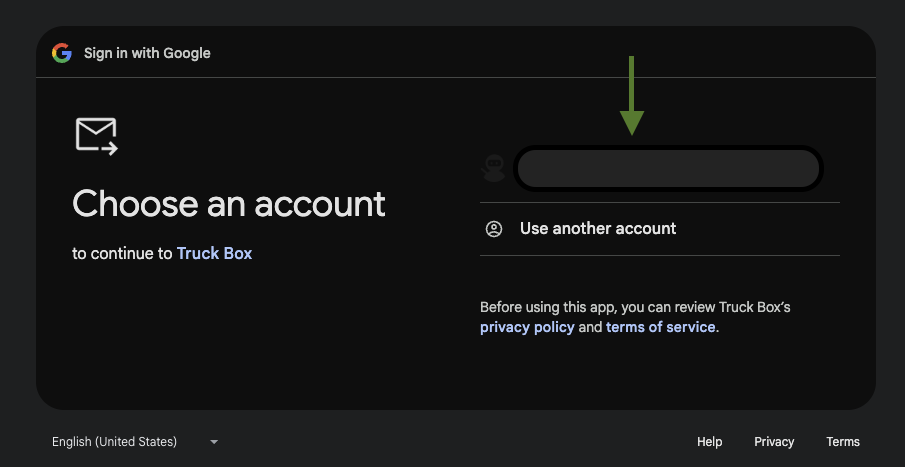
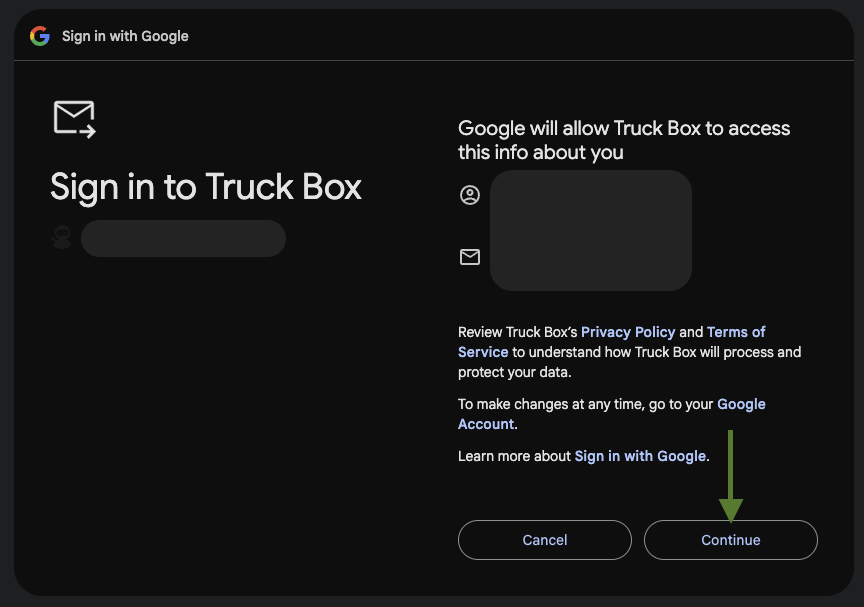
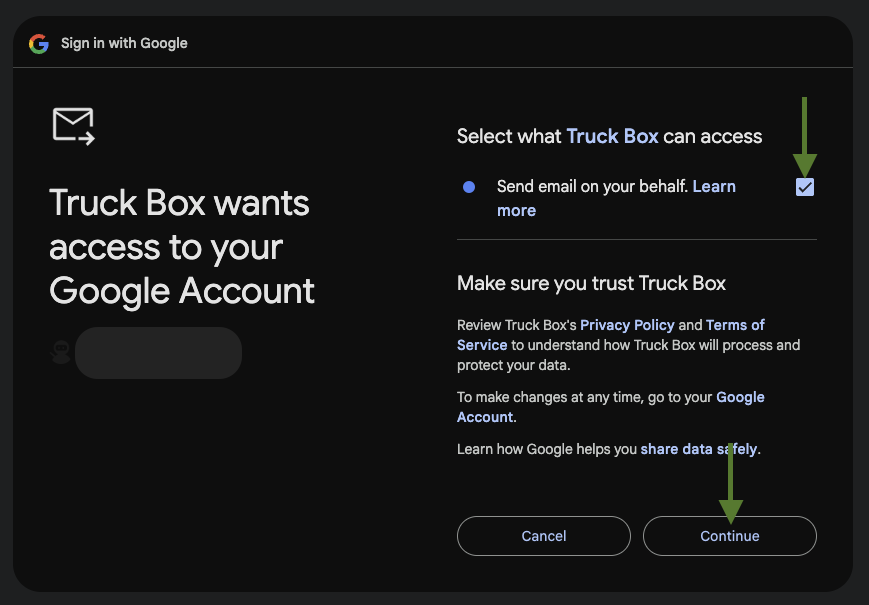
Step 3 — Login with Google
Click the Google login button and approve the requested permissions. This allows Truck Box to send emails on your behalf.
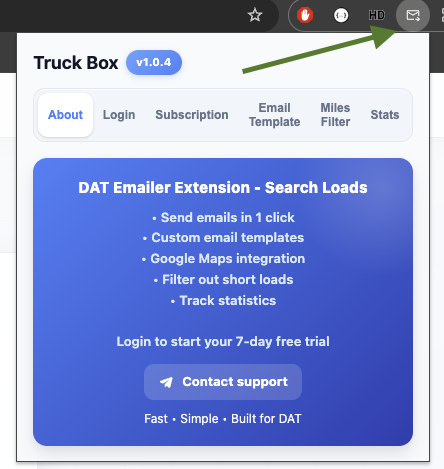
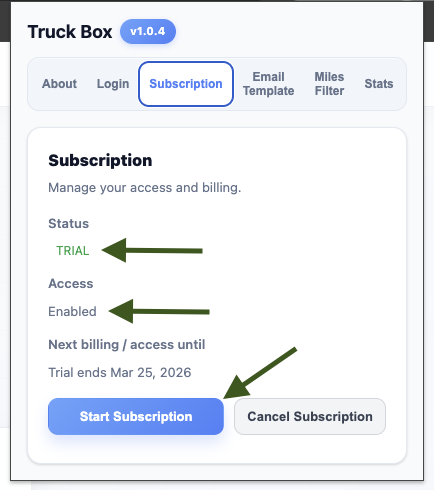
Step 4 — Start free trial
After login, activate your 7-day free trial and complete the quick setup.
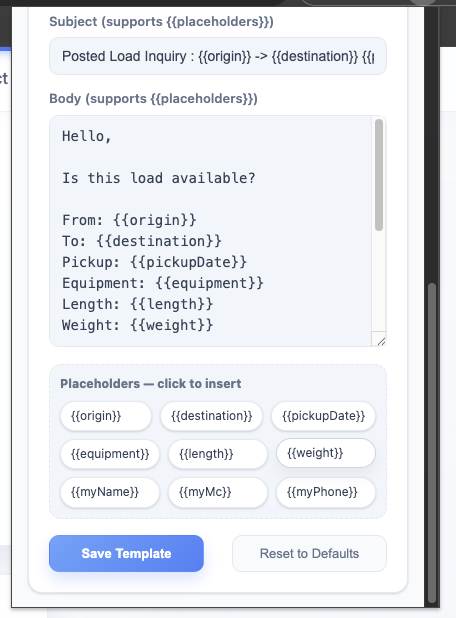
Step 5 — Fill in your email template
Set your default subject and message body for broker emails. This saves time on every load.
Template tips
- Keep subject short and clear.
- Use a professional intro with your company name.
- Include MC number, phone, and lane intent.
- Make the body reusable for different loads.
- User placeholders as provided in example {{placeHoleerName}} .
Step 6 — Use inside DAT
Open one.dat.com, browse loads, and send emails with one click using your saved templates.